Posts

Update 6-15

Image
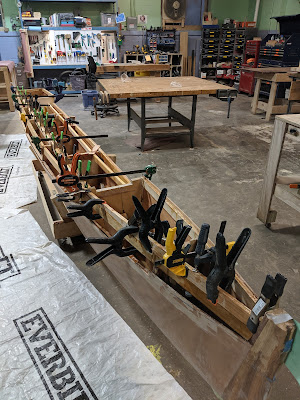
Progress Just because there's lots of dead air doesn't mean we stopped work!  A couple of key 'learnings' Once the competition season begins, it's a lot harder for a coach to spend several hours a day working on the boat. It's damn near impossible to take pictures and work with epoxy at the same time And when you work with epoxy, most of the 'work in progress' is hidden from view anyway. Putting the second hull together goes much faster than the first. So here we go... Port Hull We put the last panel on the port hull this morning.   As noted above, it did go significantly faster this time around. Panel screw clamped in place We learned a lot of tricks the first time around, and by measuring/adjusting our work from the starboard hull, we cut 2 months off the second hull's build! We also had several of our team athletes volunteer to help with assembly.  It was great to get them involved, and saved us a much longer night (or 2nd...
Update - 6/3

Image
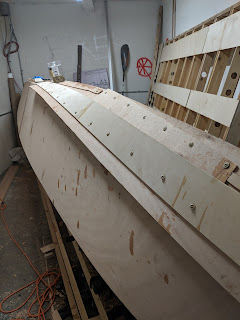
It's been a few days since the last update.  Lots going on in my other worlds, and also quite a bit of 'small work' in this one. After cutting away everything that didn't look like a boat, it was time to start filling things in.  The basic hull is quite strong, but the deck side and fittings have to be even stronger.  Imagine having a 140lb athlete putting all their weight on one knee and then on a 4mm bit of plywood - probably not a long term good prospect. Over the past two weeks, we've added additional stringers to the top deck (where the frames were bolted in, laminated plates for the fore and aft hull sections (including access ports), added pink foam for positive buoyancy, filled gaps, and reinforced anywhere we thought we might be weak. We also spent several hours doing take-offs from the starboard hull, updating drawings, and transferring to the port hull frames. Clamps.  Lots of clamps. The proof of doing all the cloning, copying and transferring is...

Rolling the hull

Image
Separated from the strongback It was a really big evening at the Hack Factory!  We unbolted and flipped the starboard hull tonight.  I'm actually pretty pleased.  A few little gremlins, I've spotted a few spots that will need some putty or a mechanical fastener to reinforce a difficult spot, but overall, it's mostly shaped like a boat, and it will float! We've got a couple of weeks left on this hull, and will start on the second one at the same time we finish the first. Bit of a tight squeeze! And it's free!  Not bad - weight around 75-80lb, which is well within the 'all up' hull target of 150. First view as it rolls up Into the cradle And out into the light A few things to fix Time to cut away anything that doesn't look like a boat.

More on glass

Image
 A few details about the fiberglass work so far... The tape was stripped and two more 'fill coats' have been added to the hull to smooth out the texture of the cloth.  A few more 'gory details' about the process. We used 6oz cloth, one piece over the entire hull, plus additional bits to reinforce the seams at the stern, and a reinforcing panel over the entire bottom from stem knuckle to the end of the fore-keel (about 7').  The second coat filled most of the cloth texture, but not all spots.  I deliberately did not try to 'gob it on' to fill all the voids.  The resin sets slowly, and would almost certainly run/sag, which would leave drip marks *and* the cloth weave.   The third coat was mixed with about 20% of microballoons as a fairing compound.  This did fill most of the remaining fabric texture, and will be much easier to sand.   I found that the simplest (and least messy) way to load the surface with resin was to hold the s...

Glass!!!

Image
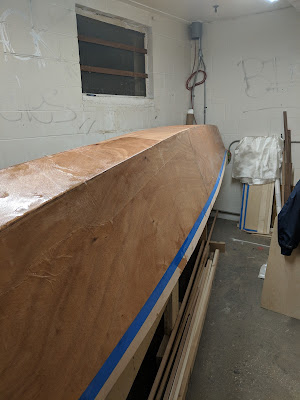
And we have glass on the starboard hull! Sorry for the delay in posting.  I was out of town on business most of the last week.  Work you get paid for has a way of getting in the way of work you do for enjoyment! It's been a busy week or so though.  Since the last post, we closed off the last two planks on the hull.  We didn't get great pictures of the last steps to closing.  suffice to say you can't use clamps on a plank that doesn't have exposed frames.  And to properly secure a plank with as much twist as the bow would require a *lot* of clamps!  So we used staples.  At first, we tried using rosin paper to provide a removal gap.  No dice.  Mahogany is too soft to stand up to mechanical extraction.  After that, we used scraps of 3-4mm planking which could be gouged to provide clearance for pliers.  I'll try to get photos when we do the other hull. My buddy Jonathan offered to help me do the glass work.  He'd not wor...

Starboard hull - almost there

Image
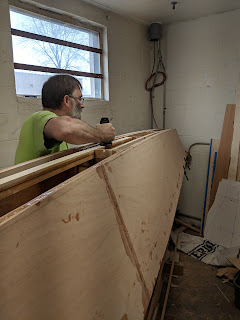
Brian doing final planing. Almost ready for sealing up.  Final planing to fair, and cutting down to the lines.  Inside foot and center section to go on Thursday night.  Fiberglass on Saturday or Sunday!!  Once the glass is on, it'll be time to remove the hull from the strongback, cradle it, and then finish the top of the hull.  At the same time, it'll be time to line up all the frames on the port hull and get it glued up!  Since all the stringers, bulkheads and panels have already been cut for the port hull, it should go together in a matter of days!!! Metro Light rail 'leaning post' While all that is going on, it's time to get a little inspiration for the deck furniture.  I was headed downtown to listen to music last week, and took the rail.  They have done everything they could to make it less friendly for people to sleep in the stations, including this canted bench.  And actually, it's one of the most comfortable leaning...

Hanging the sides

Image
 Long evening in the boat shop.  Both of us have 'day jobs' that occupy an inordinate amount of time that could better be spent building boats, except our bosses don't quite see it that way and since they sign the checks... Tonight was a major 'commit' step.  We attached the major side panels to the frame.  Before we did that, we trimmed the panels closer to an actual fit (we'll plane them down tight this weekend). I didn't grab photos since my hands/gloves were covered with epoxy, but here are the major steps tonight. 1.  Flow coat the inside of the skins with straight epoxy 2.  Flow coat/prime the frames and stringers with straight epoxy 3.  Re-cover the frames and stringers with a moderately thickened epoxy - just enough to give it a little body 4.  Attach the skins to the frame using a boatload of clamps - approximately one every foot top and bottom. 5.  Use planks to clamp the full panel in place at several stations.  We ...