Posts

Showing posts from April, 2019

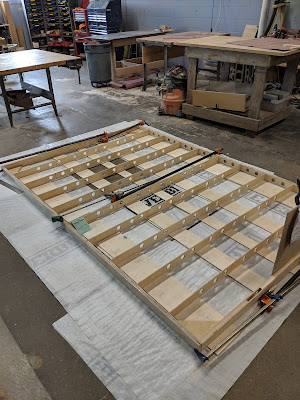
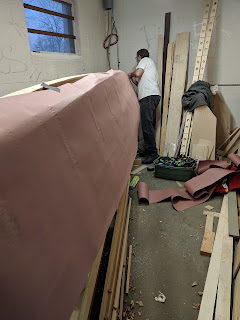
Starboard hull - almost there

Image
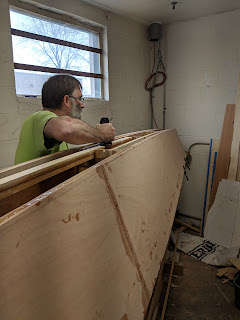
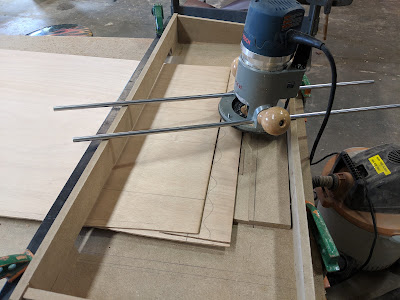
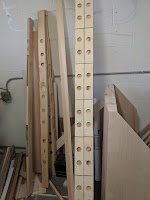
Brian doing final planing. Almost ready for sealing up.  Final planing to fair, and cutting down to the lines.  Inside foot and center section to go on Thursday night.  Fiberglass on Saturday or Sunday!!  Once the glass is on, it'll be time to remove the hull from the strongback, cradle it, and then finish the top of the hull.  At the same time, it'll be time to line up all the frames on the port hull and get it glued up!  Since all the stringers, bulkheads and panels have already been cut for the port hull, it should go together in a matter of days!!! Metro Light rail 'leaning post' While all that is going on, it's time to get a little inspiration for the deck furniture.  I was headed downtown to listen to music last week, and took the rail.  They have done everything they could to make it less friendly for people to sleep in the stations, including this canted bench.  And actually, it's one of the most comfortable leaning posts I've foun

Hanging the sides

Image
 Long evening in the boat shop.  Both of us have 'day jobs' that occupy an inordinate amount of time that could better be spent building boats, except our bosses don't quite see it that way and since they sign the checks... Tonight was a major 'commit' step.  We attached the major side panels to the frame.  Before we did that, we trimmed the panels closer to an actual fit (we'll plane them down tight this weekend). I didn't grab photos since my hands/gloves were covered with epoxy, but here are the major steps tonight. 1.  Flow coat the inside of the skins with straight epoxy 2.  Flow coat/prime the frames and stringers with straight epoxy 3.  Re-cover the frames and stringers with a moderately thickened epoxy - just enough to give it a little body 4.  Attach the skins to the frame using a boatload of clamps - approximately one every foot top and bottom. 5.  Use planks to clamp the full panel in place at several stations.  We checked for gaps, and

Squaring the deck

Image
The deck has been sitting in wait for a while now.  There was no need to rush into it, but as the hull gets closer, it's time to get it out of the way, too. Lots of pieces to fit together, and a final tolerance check.  Fortunately, everything was 'close'.  I had to shave a couple of corners, and even up some of the notches.  I also planed out the bottom of the frames so that they were fair.  This will make tacking plywood on them much simpler. i'm using Tyvek building wrap as my floor protector.  Epoxy doesn't bond to it, so it's inexpensive and reusable.  Tonight I'll go back, partly disassemble, epoxy all joints, reassemble, and brad nail everything just to provide a little mechanical help. Final squaring will be done using squares and cross-checked by measuring across opposite corners.  A final tap into place and then 24 hours to cure.    After curing, the next step will be to put the top skin on (currently on the floor), and start adding reinforcemen

Scarfing panels

Image
I built this scarfing jig using a video I found on Youtube (which I can't find again.  The setup makes a 10:1 scarf.  3cm drop over 30cm between lateral rails. I used 300x10mm drill rods that fit through the miter fence slots on the Bosch router base.  BTW, those are M5 screws to lock the rods into the base.  i used a straight cut bit on a 1/2" shaft, and worked my way back&forth from off the edge until the router didn't take anything away on the top panel. You could make this fancier by putting PTFE on the rails, and building in a hold down.  I screwed up by not having a sacrificial MDF panel running the full width of the scarf area.  I had to do a little plane work to 'fine up' the edges.  It's critical to use solid hold downs for the jig and work.  I clamped the jig to the table, the work to the jig and table using a couple of Jorgensen clamps and a square steel tube across the whole of my work, and another at the back end of the work to the table.

Panels

Image
It's been a busy last 10 days or so, with not much happening on the build last week.  Brian spent some time fairing stringers and planing to the finished form, while I took athletes to Oklahoma City for US National Team Trials.  I'm pleased to report that two Twin Cities Paddlesports athletes qualified for the Jr National Team!  You will be able to read about that on tcpaddlesports.com. Meanwhile, we started the next stage of the build - paneling. We've opted for 4mm Okoume plywood, sourced here in the Twin Cities from Midwest Boat Appeal .  They are reasonable, and a pleasure to do business with. Tonight was a big night for us.  We finished fairing and planing, and called it 'good enough'.  It's level, it's tight, and it's faired well within the bounds of a little thickened epoxy. We started out by pulling patterns for the side panels.  Probably not an absolute requirement, but for the cost of roll of rosin paper, it makes things so much easier.

Locked and loaded

Image
It's been a busy week here.  Deck beams and furniture  It's been a busy week at the Hack Factory.  Several efforts in parallel have started to gain traction, and we are making progress!!!  To the right, you can see the lightened beams for the deck rails, and the sandwiched ribs for the first/last rib on the deck.  These will transfer the buk of the load from deck to hull, and tie the boat together.   Here's a bit of progress gluing up the keel.  The design has a split keel - the forward half is centered along the vertex, and the aft is split to provide support on the stern half of the hull.  Clamped in place, and using Adtech Pro-build with a little Cabosil (www.expresscomposites.com) mixed in to give it some body.  I put enough in the joint to squeeze a bit back out, clamp it in place, and then let it cook overnight. Hmmm. Sounds like my favorite BBQ technique...  And it's time for glue-up!!! We spent about 4 hours on Thursday evening checking all s