Scarfing panels

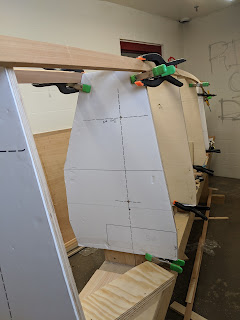
I used 300x10mm drill rods that fit through the miter fence slots on the Bosch router base. BTW, those are M5 screws to lock the rods into the base. i used a straight cut bit on a 1/2" shaft, and worked my way back&forth from off the edge until the router didn't take anything away on the top panel.
You could make this fancier by putting PTFE on the rails, and building in a hold down.
I screwed up by not having a sacrificial MDF panel running the full width of the scarf area. I had to do a little plane work to 'fine up' the edges.
It's critical to use solid hold downs for the jig and work. I clamped the jig to the table, the work to the jig and table using a couple of Jorgensen clamps and a square steel tube across the whole of my work, and another at the back end of the work to the table.
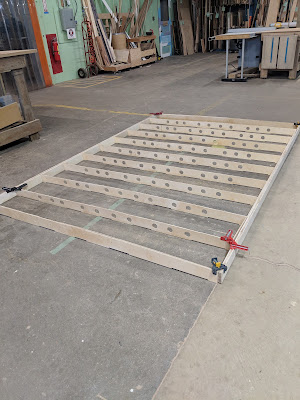
Was it perfect? No. Did it get darn close? Yep! I'll use it again for decking reinforcement, and the other side. As it happens, for a 16' boat, you only need 2 scarfs on each hull. The bottom of the hull gets a butt joint on frame 5, the top stops at frame two and then runs at a different level from 2-6 and 6-stern. Still this saved time, and hopefully made things go together more easily!


Comments
Post a Comment