The good, the bad and the ugly...
I've been remiss in posting *anything* about anything for the past couple of weeks. It's summertime, the team is busy, and I'm burning the candle at both ends (and sometimes in the middle too).
Since the last post, we've taken a couple of steps backwards, a couple sideways, and several steps forward.
First the good:
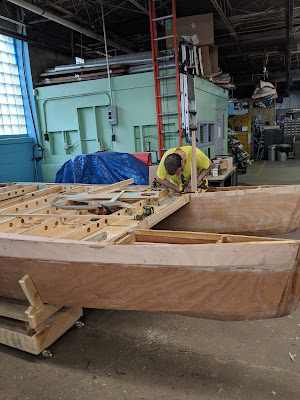
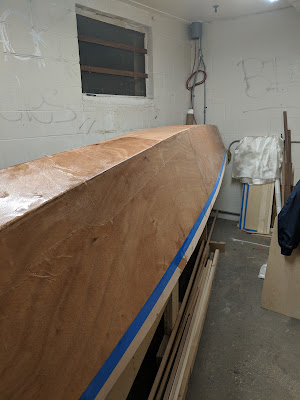
 We've got a boat, mostly. Another 20 hours of work on hulls, finish the deck, and build a little deck furniture to get us through this year.
This week has been devoted to getting the deck aligned, the boat square, and bolt holes bored to secure the deck to the hulls.
Next up is to seal up the hulls, glass the top and a few other reinforcements, and add some final reinforcements to the deck before doing the same with it.
The bad...
 The deck was a total and nearly disaster. Initially, I went with lots of thin ribs, inlet panels to reinforce the structure, and had a great plan to epoxy it all together and it would magically be light and stupid strong. Fairy tales! What happened was that the laterals were uneven, there was insufficient glue surface to attach the ribs to the deck, and *every* imperfection magnified itself. The net was that the design was weak torsionally, with poor structural integrity. it took me less than 15 minutes with a Sawzall and a mallet&chisel to take it back to components.
We then started over using the KISS principle, laminating cedar 1x3" to the existing ribs, doubling a few, and resetting on 16" centers instead of 9", and then using PE adhesive and screws to pull it all together. PE bonds well, fills any voids, and when used in combination with screws, makes an extremely solid platform. We tested for feel by putting it up on 4 bricks, and both of us (200+lb) adults getting on and doing a little stress testing. Plenty stiff, more than strong enough once the top is attached.
The ugly...
 I measured. Brian measured. We measured differently, but came to the same conclusions on where we placed forms, attached stringers, and pretty much anything else. And yet somehow, we still managed to glue the stern on the second hull 2" *behind* where it should have been! And unfortunately, we didn't find it until it was glassed in, triple coated and ready to finish. And so we did a little meatball surgery, saved the frame, and finagled it from there. And it came out pretty OK. Screws removed, holes filled, and a couple of extra layers of glass, it'll be fine.
Since the last post, we've taken a couple of steps backwards, a couple sideways, and several steps forward.
First the good:
 We've got a boat, mostly. Another 20 hours of work on hulls, finish the deck, and build a little deck furniture to get us through this year.
 This week has been devoted to getting the deck aligned, the boat square, and bolt holes bored to secure the deck to the hulls.
Next up is to seal up the hulls, glass the top and a few other reinforcements, and add some final reinforcements to the deck before doing the same with it.
The bad...
 The deck was a total and nearly disaster. Initially, I went with lots of thin ribs, inlet panels to reinforce the structure, and had a great plan to epoxy it all together and it would magically be light and stupid strong. Fairy tales! What happened was that the laterals were uneven, there was insufficient glue surface to attach the ribs to the deck, and *every* imperfection magnified itself. The net was that the design was weak torsionally, with poor structural integrity. it took me less than 15 minutes with a Sawzall and a mallet&chisel to take it back to components.
The ugly...
 I measured. Brian measured. We measured differently, but came to the same conclusions on where we placed forms, attached stringers, and pretty much anything else. And yet somehow, we still managed to glue the stern on the second hull 2" *behind* where it should have been! And unfortunately, we didn't find it until it was glassed in, triple coated and ready to finish. And so we did a little meatball surgery, saved the frame, and finagled it from there. And it came out pretty OK. Screws removed, holes filled, and a couple of extra layers of glass, it'll be fine.


Comments
Post a Comment