Assembling the bits
It's been entirely too long since the last post, and much has happened along the way. The boat is basically finished and put away for the winter. For those not from the upper midwest, the lake is now 6 or 8" thick and will remain so until March (or April).
So for now, I'll try to do some catch-up, trying to remember as many of the horror stories as possible!
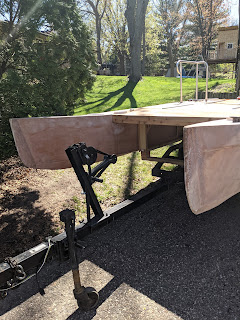
The last set of photos had the deck sitting in between the hulls, but nothing attached.
A couple of days later, we got back from regatta and started final assembly.

After a lot of head scratching, I went of a fairly brute force approach to mating the deck and hull. The photo on the right shows a 5/8" stainless bolt and 1" aluminum bar, tapped and designed to mount 'blind'. In hindsight, I underestimated the difficulty of getting the darn things lined up and threads started. This will get modified in the spring to have access hatches in the deck, and at whatever point the billets strip out, I'll replace the bolts and use a nut on the inside of the deck. I wanted the plates to distribute any loads.
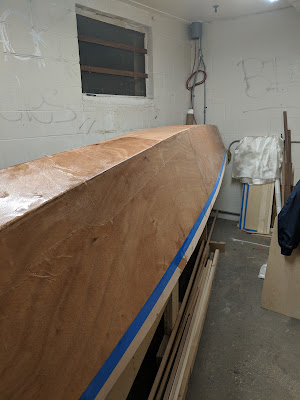
Finishing up the hulls was reasonably straightforward. mount the top plate, epoxy (and a few screws to hold it down, weight it down and walk away.
There is undoubtedly a better way to build a flat plate deck, attach all the deck furniture, and then seal it all up. I'm sure i found the most difficult method. We measured carefully and added doublers/triplers to the underside
This also involved a lot of guessing as to center of mass and assumptions about where things would actually wind up.
Mostly I was 'close'...
Speaking of deck furniture, I liked the looks of the deacon's bench sitting in the shop, and took the seat lines off from it. The console was derived by standing at a table with a paper plate in my hand, and pretending to drive the boat.
Don't laugh, it works:)

Everything roughed in place.
I was off by about a foot on the center of mass, but except for the console placement, that was within the predicted range.
So for now, I'll try to do some catch-up, trying to remember as many of the horror stories as possible!
The last set of photos had the deck sitting in between the hulls, but nothing attached.
A couple of days later, we got back from regatta and started final assembly.

After a lot of head scratching, I went of a fairly brute force approach to mating the deck and hull. The photo on the right shows a 5/8" stainless bolt and 1" aluminum bar, tapped and designed to mount 'blind'. In hindsight, I underestimated the difficulty of getting the darn things lined up and threads started. This will get modified in the spring to have access hatches in the deck, and at whatever point the billets strip out, I'll replace the bolts and use a nut on the inside of the deck. I wanted the plates to distribute any loads.
Finishing up the hulls was reasonably straightforward. mount the top plate, epoxy (and a few screws to hold it down, weight it down and walk away.
There is undoubtedly a better way to build a flat plate deck, attach all the deck furniture, and then seal it all up. I'm sure i found the most difficult method. We measured carefully and added doublers/triplers to the underside
This also involved a lot of guessing as to center of mass and assumptions about where things would actually wind up.
Mostly I was 'close'...
Speaking of deck furniture, I liked the looks of the deacon's bench sitting in the shop, and took the seat lines off from it. The console was derived by standing at a table with a paper plate in my hand, and pretending to drive the boat.
Don't laugh, it works:)

Everything roughed in place.
I was off by about a foot on the center of mass, but except for the console placement, that was within the predicted range.


Comments
Post a Comment